
LAMP环境是常用的Web开发环境之一,其中LAMP分别代表Linux、Apache、MySQL和PHP。本文介绍如何在Ubuntu操作系统的轻量应用服务器实例内部署LAMP环境。
如果您还没创建轻量应用服务器,建议您直接通过LAMP应用镜像快速搭建LAMP环境。具体操作,请参见搭建LAMP开发环境(通过应用镜像)。
如果您需要在Alibaba Cloud Linux/CentOS 7.x操作系统中部署LAMP环境。具体操作,请参见手动搭建LAMP开发环境(Alibaba Cloud Linux/CentOS 7.x)。
准备工作
创建用于部署LAMP环境的轻量应用服务器实例。具体操作,请参见创建轻量应用服务器。
该实例必须满足以下条件:
操作系统:Ubuntu 22.04、Ubuntu 20.04、Ubuntu 18.04。
实例安全组的入方向规则已放行22、80、443端口。具体操作,请参见管理防火墙。
步骤一:安装Apache
远程连接需要部署LAMP环境的轻量应用服务器实例。具体操作,请参见远程连接Linux服务器。
运行以下命令,更新Ubuntu系统内的软件包。
sudo apt update运行以下命令,安装Apache。
sudo apt-get -y install apache2运行以下命令,查看Apache版本。
apache2 -v返回结果类似如下所示,表示Apache已成功安装,Apache的版本为2.4.52。

运行以下命令,启动Apache服务并设置服务开机自启动。
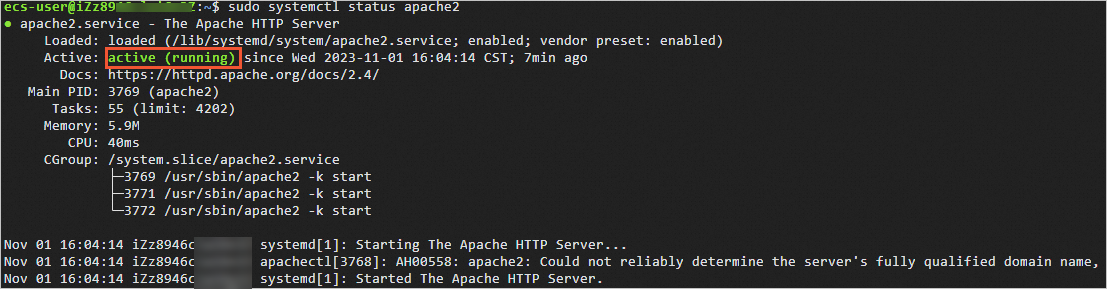
sudo systemctl start apache2
sudo systemctl enable apache2
运行以下命令,查看Apache服务状态。
sudo systemctl status apache2返回结果类似如下所示,表示Apache已启动。
步骤二:安装并配置MySQL
安装MySQL。
运行以下命令,安装MySQL。
sudo apt -y install mysql-server运行以下命令,查看MySQL版本。
mysql -V返回结果类似如下所示,表示MySQL已成功安装,MySQL的版本为8.0.35。

运行以下命令,启动MySQL服务。
sudo systemctl start mysql依次运行以下命令,设置开机启动MySQL。
sudo systemctl enable mysql
sudo systemctl daemon-reload
配置MySQL。
运行以下命令,进入MySQL。
sudo mysql运行以下命令,设置root用户密码。
ALTER USER 'root'@'localhost' IDENTIFIED WITH mysql_native_password by 'mynewpassword';本示例中密码以
Mysql@1234为例,示例命令:ALTER USER 'root'@'localhost' IDENTIFIED WITH mysql_native_password by 'Mysql@1234';运行以下命令,退出MySQL数据库。
exit;运行以下命令,对MySQL进行安全性配置。
sudo mysql_secure_installation根据命令行提示,依次完成以下配置项。
输入root用户的密码。本示例中输入
Mysql@1234。ecs-user@iZbp19jsi7s0g7m4zgc****:~# sudo mysql_secure_installation Securing the MySQL server deployment. Enter password for user root:说明在输入密码时,系统为了最大限度地保证数据安全,命令行将不做任何回显。您只需要输入正确的密码信息,然后按Enter键即可。
输入
Y,设置密码验证策略。VALIDATE PASSWORD COMPONENT can be used to test passwords and improve security. It checks the strength of password and allows the users to set only those passwords which are secure enough. Would you like to setup VALIDATE PASSWORD component? Press y|Y for Yes, any other key for No: Y选择密码验证策略。
本示例输入2。
There are three levels of password validation policy:

LOW Length >= 8
MEDIUM Length >= 8, numeric, mixed case, and special characters
STRONG Length >= 8, numeric, mixed case, special characters and dictionary file

Please enter 0 = LOW, 1 = MEDIUM and 2 = STRONG: 0
输入
Y,更改root用户密码。Change the password for root ? ((Press y|Y for Yes, any other key for No) : Y输入root用户密码。
New password:

Re-enter new password:

Estimated strength of the password: 100
输入
Y,确认使用已设置的密码。Do you wish to continue with the password provided?(Press y|Y for Yes, any other key for No) : Y输入
Y,删除MySQL自带的匿名用户。By default, a MySQL installation has an anonymous user, allowing anyone to log into MySQL without having to have a user account created for them. This is intended only for testing, and to make the installation go a bit smoother. You should remove them before moving into a production environment. Remove anonymous users? (Press y|Y for Yes, any other key for No) : Y输入
Y,禁止MySQL的root用户的远程登录权限。Normally, root should only be allowed to connect from 'localhost'. This ensures that someone cannot guess at the root password from the network. Disallow root login remotely? (Press y|Y for Yes, any other key for No) : Y输入
Y,移除test数据库。By default, MySQL comes with a database named 'test' that anyone can access. This is also intended only for testing, and should be removed before moving into a production environment. Remove test database and access to it? (Press y|Y for Yes, any other key for No) :输入
Y,重新加载授权表。Reloading the privilege tables will ensure that all changes made so far will take effect immediately. Reload privilege tables now? (Press y|Y for Yes, any other key for No) : Y当命令行回显All done!时,表示配置完成。
测试登录MySQL数据库。
运行以下命令,登录MySQL数据库。
sudo mysql -uroot -p在命令行回显的
Enter password:后输入已设置的数据库密码。说明在输入密码时,系统为了最大限度地保证数据安全,命令行将不做任何回显。您只需要输入正确的密码信息,然后按Enter键即可。
成功登录MySQL数据库后,命令行信息如下所示。
ecs-user@iZbp19jsi7s0g7m4zgc****:~# sudo mysql -uroot -p
Enter password:
Welcome to the MySQL monitor.  Commands end with ; or \g.
Your MySQL connection id is 15
Server version: 8.0.29-0ubuntu0.20.04.3 (Ubuntu)

Copyright (c) 2000, 2022, Oracle and/or its affiliates.

Oracle is a registered trademark of Oracle Corporation and/or its
affiliates. Other names may be trademarks of their respective
owners.

Type 'help;' or '\h' for help. Type '\c' to clear the current input statement.

mysql>
运行以下命令,退出MySQL数据库。
exit;
步骤三:安装PHP
依次运行以下命令,安装PHP。
sudo apt -y install php-fpm
sudo apt -y install libapache2-mod-php
运行以下命令,查看PHP版本。
php -v返回结果类似如下所示,表示PHP已成功安装,PHP的版本为7.4.3。

在Apache网站根目录中,创建测试网页。
运行以下命令,查看Apache网站根目录的路径信息。
sudo cat /etc/apache2/sites-available/000-default.conf命令行返回结果中的
DocumentRoot /var/www/html一行,即表示网站根目录为/var/www/html。运行以下命令,在网站根目录创建测试网页,并把
phpinfo()函数添加至网页内容中。phpinfo()函数会展示PHP的所有配置信息。sudo sh -c 'echo "<?php phpinfo(); ?>" > /var/www/html/phpinfo.php'
运行以下命令,重启Apache服务。
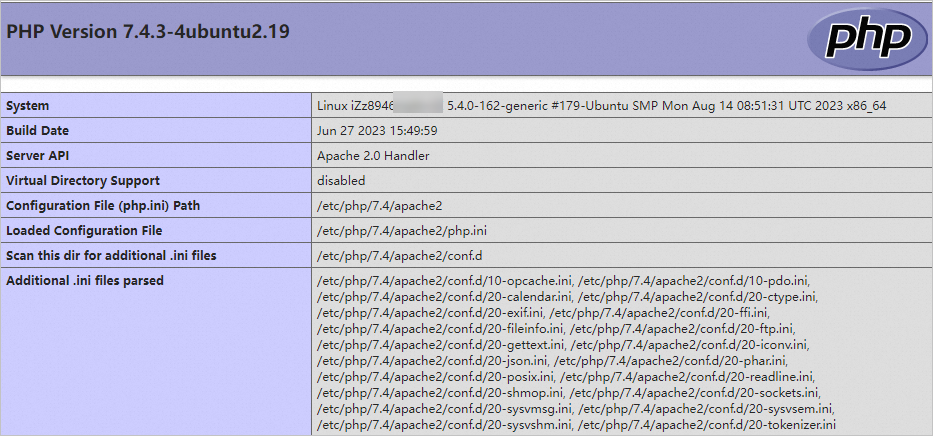
sudo systemctl restart apache2在本地机器浏览器地址栏,输入
http://<轻量应用服务器实例公网IP地址>/phpinfo.php并按Enter键。显示如下页面表示安装成功。
成功搭建LAMP环境后,建议您删除phpinfo.php测试文件,消除数据泄露风险。
sudo rm -rf <网站根目录>/phpinfo.php本教程中网站根目录为
/var/www/html,则需要运行以下命令删除测试文件。sudo rm -rf /var/www/html/phpinfo.php